파일을 열면, TextCtrl에서 제대로된 파일 내용을 호출 하지 못하는 문제점이 있는데.
이유는 wxWidgets에서 TextCtrl에 데이터를 옮기는 기능이 있어야하기 때문이다.
wxMain.h에 다음과 같은 방식으로 정의 한다.
|
1
2
3
4
5
6
7
8
9
10
11
12
13
14
15
16
17
18
19
20
21
22
23
24
25
26
27
28
29
30
31
32
33
34
35
36
37
38
39
40
41
42
43
44
45
46
47
48
49
50
|
#pragma once
#include "wx/wx.h"
#include <wx/filedlg.h>
#include <wx/textctrl.h>
#include <wx/splitter.h>
// 파일을 읽어 들이기 위한 용도.
#include <fstream>
#include <sstream>
#include "wxOptionsDialog.h"
enum
{
ID_QUIT,
};
enum {
MY_EVENT_ID = 10001,
};
// ID 값 정의
enum
{
ID_Settings_Menu = wxID_HIGHEST + 1 // 사용자 정의 ID
};
class MyApp : public wxApp
{
public:
virtual bool OnInit();
};
class MyFrame : public wxFrame
{
public:
MyFrame(const wxString& title);
void OnQuit(wxCommandEvent& event);
private:
wxTextCtrl* textControl;
void OnOpen(wxCommandEvent& event);
void OnSave(wxCommandEvent& event);
void OnButtonClick(wxCommandEvent& event);
void OnSettings(wxCommandEvent& event);
};
|
cs |
wxMain.cpp에서 파일을 열면, 그 파일의 내용을 불러와서 작성할 수 있게 한다.
|
1
2
3
4
5
6
7
8
9
10
11
12
13
14
15
16
17
18
19
20
21
22
23
24
25
26
27
28
29
30
31
32
33
34
35
36
37
38
39
40
41
42
43
44
45
46
47
48
49
50
51
52
53
54
55
56
57
58
59
60
61
62
63
64
65
66
67
68
69
70
71
72
73
74
75
76
77
78
79
80
81
82
83
84
85
86
87
88
89
90
91
92
93
94
95
96
97
98
99
100
101
|
#include "wxMain.h"
wxIMPLEMENT_APP(MyApp);
bool MyApp::OnInit()
{
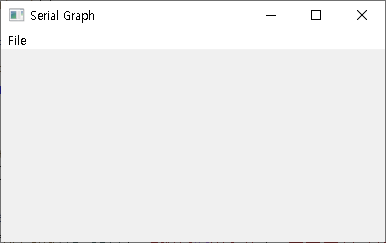
MyFrame* frame = new MyFrame("Serial Graph");
frame->Show(true);
return true;
}
MyFrame::MyFrame(const wxString& title)
: wxFrame(NULL, wxID_ANY, title)
{
wxMenu* menuFile = new wxMenu;
menuFile->Append(wxID_OPEN, "&Open\tCtrl-O", "Open a file");
menuFile->Append(wxID_SAVE, "&Save\tCtrl-S", "Save the file");
menuFile->AppendSeparator();
menuFile->Append(ID_QUIT, "E&xit\tAlt-X", "프로그램 종료");
wxMenu* menuOptions = new wxMenu;
menuOptions->Append(ID_Options, "&Options", "Options Setting");
    wxMenuBar* menuBar = new wxMenuBar;
    menuBar->Append(menuFile, "&File");
menuBar->Append(menuOptions, "&Options");
SetMenuBar(menuBar);
textControl = new wxTextCtrl(this, wxID_ANY, "", wxDefaultPosition, wxDefaultSize, wxTE_MULTILINE);
// sizer를 생성하여 텍스트 컨트롤의 크기를 조정합니다.
wxBoxSizer* sizer = new wxBoxSizer(wxVERTICAL);
sizer->Add(textControl, 1, wxEXPAND | wxALL, 0); // wxEXPAND는 컨트롤이 sizer의 가능한 모든 공간을 차지하도록 합니다. 1은 비율을 의미하며, 이 경우 다른 컨트롤이 없으므로 전체 크기를 차지합니다.
// 프레임에 sizer를 설정합니다.
this->SetSizer(sizer);
this->Layout(); // sizer를 강제로 다시 계산하여 적용합니다.
CreateStatusBar();
SetStatusText("Ready");
    // 이벤트 핸들러 연결
    Bind(wxEVT_MENU, &MyFrame::OnQuit, this, ID_QUIT);
Bind(wxEVT_MENU, &MyFrame::OnOpen, this, wxID_OPEN);
Bind(wxEVT_MENU, &MyFrame::OnSave, this, wxID_SAVE);
Bind(wxEVT_MENU, &MyFrame::OnSettings, this, ID_Options);
}
void MyFrame::OnQuit(wxCommandEvent& event)
{
Close(true);
}
void MyFrame::OnOpen(wxCommandEvent& event)
{
wxFileDialog openFileDialog(this, _("Open TXT file"), "", "",
"TXT files (*.txt)|*.txt", wxFD_OPEN | wxFD_FILE_MUST_EXIST);
if (openFileDialog.ShowModal() == wxID_CANCEL)
return; // 사용자가 취소했을 때
std::ifstream file(openFileDialog.GetPath().ToStdString());
// 파일을 열고 텍스트 컨트롤에 내용을 로드합니다.
if (textControl->LoadFile(openFileDialog.GetPath())) {
std::stringstream buffer;
buffer << file.rdbuf(); // 파일의 내용을 buffer에 읽어 들입니다.
file.close(); // 파일을 닫습니다.
// textControl의 내용을 갱신합니다.
textControl->SetValue(buffer.str());
// 타이틀을 열린 파일의 이름으로 설정합니다.
SetTitle(openFileDialog.GetFilename());
}
else {
wxMessageBox("Cannot open File!", "Error", wxOK | wxICON_ERROR);
}
}
void MyFrame::OnSave(wxCommandEvent& event)
{
wxFileDialog saveFileDialog(this, _("Save TXT file"), "", "",
"TXT files (*.txt)|*.txt", wxFD_SAVE | wxFD_OVERWRITE_PROMPT);
if (saveFileDialog.ShowModal() == wxID_CANCEL)
return; // 사용자가 취소했을 때
// 현재 텍스트 컨트롤의 내용을 파일에 저장합니다.
textControl->SaveFile(saveFileDialog.GetPath());
}
void MyFrame::OnSettings(wxCommandEvent& event)
{
wxOptionDialog dialog(this, wxID_ANY, "Settings");
if (dialog.ShowModal() == wxID_OK)
{
// 사용자가 설정을 변경하고 OK를 클릭했을 때의 처리
SetStatusText("Settings Updated");
}
}
|
cs |
이렇게 해서 file.rdbuf을 이용해서 버퍼를 저장하고, 그걸 textControl에 출력하도록 하는 것으로 SetValue라는 메소드를 사용한다.
SetLabelString이라는 것과 같이 있는데.
여기서, SetLabelString은 줄 바꿈이 존재하지 않는 것이고, SetValue는 줄바꿈을 자동으로 적용해준다.
'프로그래밍 > wxWidgets' 카테고리의 다른 글
| [wxWidgets] 콤보박스 추가하기. (0) | 2024.02.07 |
|---|---|
| [wxWidgets] TextCtrl의 폰트를 수정하기 (0) | 2024.02.06 |
| [wxWidgets] 윈도우 제목 변경 기능 (0) | 2024.02.05 |
| [wxWidgets] 옵션 창 띄우기 (0) | 2024.02.05 |
| [wxWidgets] 텍스트 컨트롤 창 가득 채우기. (0) | 2024.02.04 |